NuxtJS와 VuetifyJS를 이용해 만들었습니다.
최종 목표는
1. NuxtJS 웹에서 첨부한 파일을 Express로 넘겨준다.
2. Express에서 Multer를 이용해 ElasticSearch에 데이터를 생성한다.
이렇게이고, 이 글에서는 1번에 대해 작성.
2번에 대한 글은 (https://minu0807.tistory.com/112) 여기를 봐주세요.
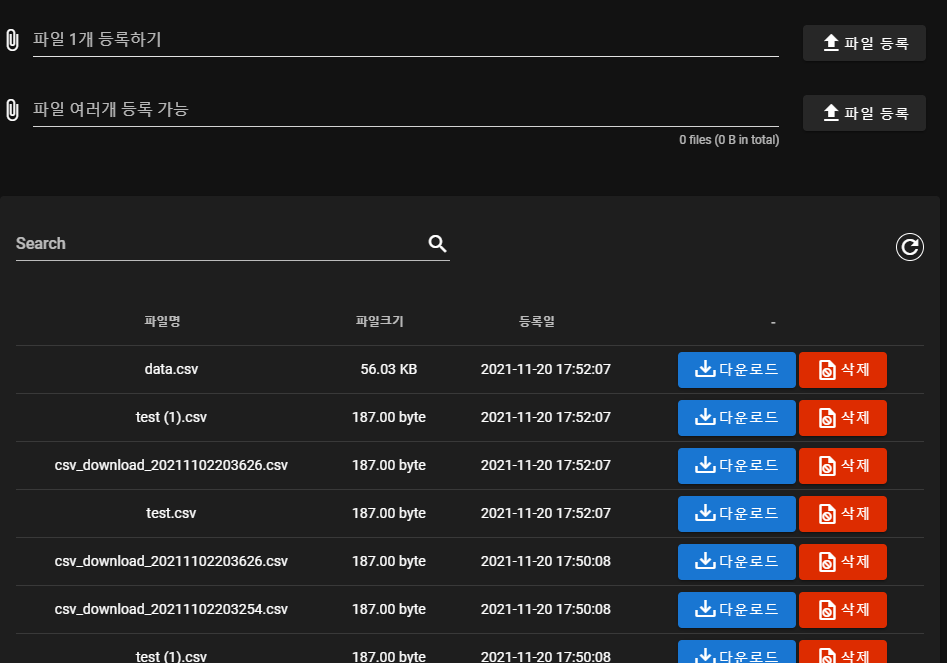
우선 만든 화면은 이렇다.
파일 첨부 역할을 하는 컴포넌트 1개와 엘라스틱서치에 저장된 데이터를 가져와 리스트를 보여주는 테이블 컴포넌트 1개 이렇게 2개의 컴포넌트로 구성되어 있다.
리스트는 생략하고 등록 부분 소스
<template>
  <v-layout column>
    <alert ref="alertCom"/>
    <v-form ref="form" lazy-validation>
      <v-row align="center">
        <v-col cols="10">
          <v-file-input
            show-size
            label="파일 1개 등록하기"
            v-model="file"
            :rules="file_rules"
          ></v-file-input>
        </v-col>
        <v-col cols="2">
          <v-btn
            @click="upload"
            >
            <v-icon>mdi-upload</v-icon> 파일 등록
          </v-btn>
        </v-col>
      </v-row>
    </v-form>
    <v-form ref="form2" lazy-validation>
      <v-row align="center">
        <v-col cols="10">
          <v-file-input
            show-size
            counter
            small-chips
            multiple
            label="파일 여러개 등록 가능"
            v-model="files"
            :rules="files_rules"
          ></v-file-input>
        </v-col>
        <v-col cols="2">
          <v-btn
            @click="multi_upload"
            >
            <v-icon>mdi-upload</v-icon> 파일 등록
          </v-btn>
        </v-col>
      </v-row>
    </v-form>
  </v-layout>
</template>

<script>
import alert from '@/components/custom/confirm'
export default {
  components: {
    alert
  },
  data() {
    return {
      file: null,
      file_rules: [
        v => !(v && v.size > 5000000) || '5MB 이상의 파일은 첨부할 수 없습니다.'
      ],
      files: null,
      files_rules: [
        v => !(v && v.length > 5) || '파일은 최대 5개까지만 등록할 수 있습니다.'
      ]
    }
  },
  methods: {
    async upload() { //단일 파일 업로드
      if (this.file === null) {
        this.$store.dispatch('updateAlert', {
          alert:true,
          type: 'error',
          title: '파일 등록',
          text: '첨부할 파일을 선택해주세요'
        })
      } else {
        const validate = this.$refs.form.validate();
        if (validate) {
          const cf = await this.$refs.alertCom.open({
            type: 'info',
            title: '파일 등록',
            text: `[${this.file.name}] 파일을 등록하시겠습니까?`
          });
          if (cf) {
            let formData = new FormData();
            formData.append('file', this.file);
            try {
              const rs = await this.$store.dispatch('file/uploadFile', formData);
              if (rs) {
                this.file = null;
                await this.$store.dispatch('file/initList', {});
              }
            } catch (err) {
              console.error(err);
            }
          }
        }
      }
    },
    async multi_upload() { //다중 파일 업로드
      if (this.files === null) {
        this.$store.dispatch('updateAlert', {
          alert:true,
          type: 'error',
          title: '파일 등록',
          text: '첨부할 파일을 선택해주세요'
        })
      } else {
        const validate = this.$refs.form2.validate();
        if (validate) {
          const cf = await this.$refs.alertCom.open({
            type: 'info',
            title: '파일 등록',
            text: `${this.files.length} 개의 파일을 등록하시겠습니까?`
          });
          if (cf) {
            let formData = new FormData();
            formData.append('files', this.files);
            for (let i in this.files) {
              formData.append('files', this.files[i]);
            }
            try {
              const rs = await this.$store.dispatch('file/uploadMultiFile', formData);
              if (rs) {
                this.files = null;
                await this.$store.dispatch('file/initList', {});
              }
            } catch (err) {
              console.error(err);
            }
          }
        }
      }
    }
  }
}
</script>

<style>

</style>
Vuetify에서 제공하는 v-file-input를 이용했다.
https://vuetifyjs.com/en/components/file-inputs/#usage
File input component
The file input component is a specialized input that provides a clean interface for selecting files, showing detaile...
vuetifyjs.com
크게 어려운 건 없어서 딱히 설명할 게 없다..
rules 속성을 이용해 유효성 검사를 했고, v-form의 validate를 이용해 유효성 검사를 통과하지 못하면 등록할 수 없도록 했다.
신경 써주어야 할 부분은 FormData 부분.
let formData = new FormData();
formData.append('file', this.file);
formData의 key 값은 나중에 express에서 multer를 이용해서 받을 때 사용한다.
난 store를 이용하는 게 익숙해서 store를 사용한 소스인데 그냥 바로 axios를 이용해 express로 날려도 된다.
store 쪽 소스
export const actions = {
  uploadFile({commit, dispatch}, params) {
    return new Promise(async (resolve, reject) => {
      try {
        const rs = await this.$axios.post('/api/v1/file/file_upload', params);
        resolve(true);
      } catch (err) {
        console.error(err);
        reject(err);
      }
    })
  },
  uploadMultiFile({commit}, params) {
    return new Promise( async (resolve, reject) => {
      try {
        const rs = await this.$axios.post('/api/v1/file/file_multi_upload', params);
        resolve(true);
      } catch (err) {
        console.error(err);
        reject(err);
      }
    })
  }
}
그냥 받은거 그대로 넘겨준다.
'VueJS > Nuxt' 카테고리의 다른 글
| [VueJS] Nuxt3 설치 및 layouts, pages 적용(compositionAPI) (0) | 2023.06.04 |
|---|---|
| [VueJS] nuxt-socket-io 모듈 사용해보기 (8) | 2022.04.22 |
| [VueJS] NuxtJS+Vuetify confirm 컴포넌트 만들어보기 (0) | 2021.09.26 |
| [VueJS] NuxtJS에서의 window.open 사용 (0) | 2021.08.30 |
| [VueJS] NuxtJS 빌드시 'md': $grid-gutter / 3 에러 (0) | 2021.08.02 |